Windows Server 2019 Installation
To install Windows Server 2019 download the Standard edition
Boot to the ISO image or DVD to start the Windows Server 2019 installer.
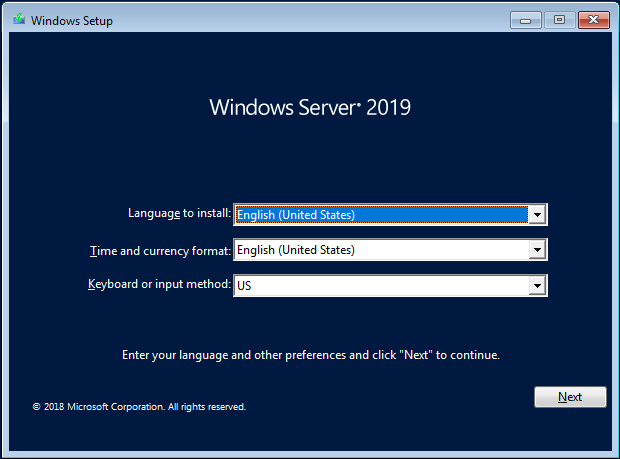
Click Next to continue.
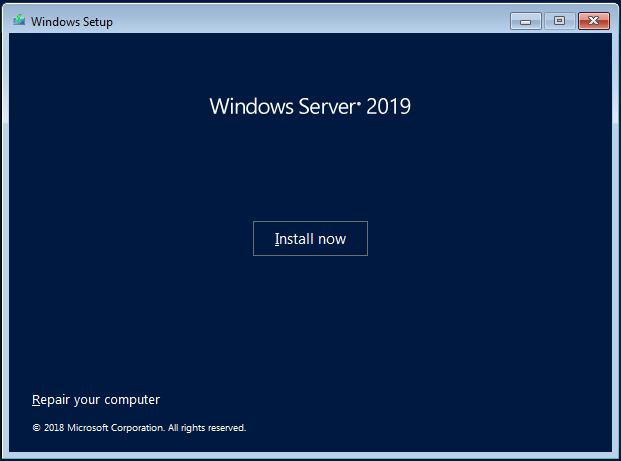
Click Install Now.
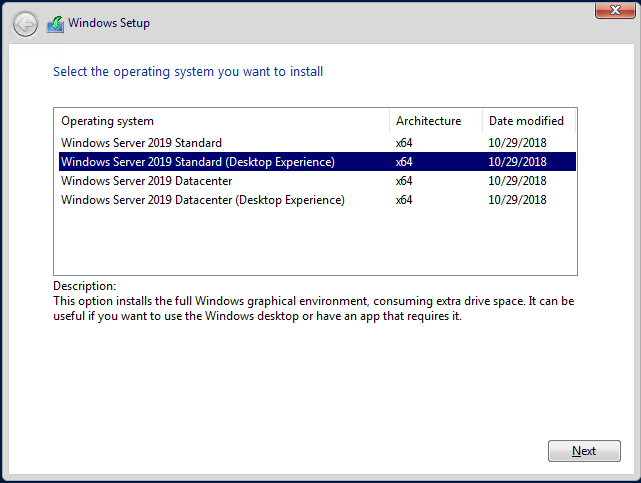
BWTST recommends installing Windows Server 2019 Standard (Server with a GUI). The default selection is Server Core Installation so you must make sure to click on Desktop Experience in the window above. After selecting the desired version click Next.
NOTE: The Department of the Interior’s (DOI) Microsoft Enterprise agreement does not include licensing for the Datacenter edition, only Standard edition, although both are included in the same ISO download. If you need to install Datacenter edition, licenses must be purchased. See Microsoft Enterprise Agreement.
NOTE: A product key for Server 2019 is not needed and you will not be prompted to enter one. Server 2019 will automatically register itself with the KMS Server once the machine is added to the domain.
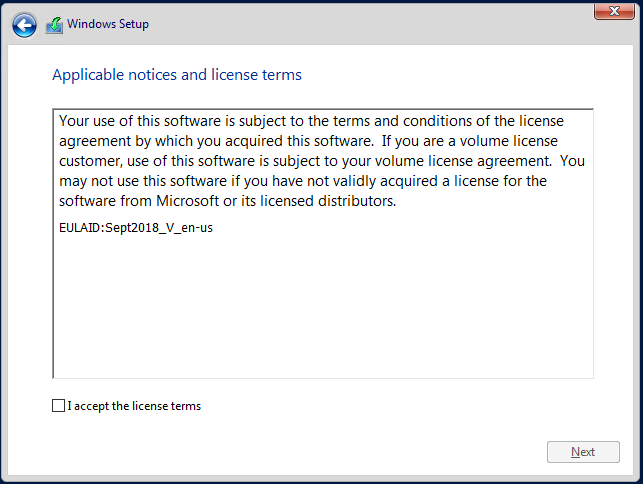
Check the box next to “I accept the license terms” and click Next.
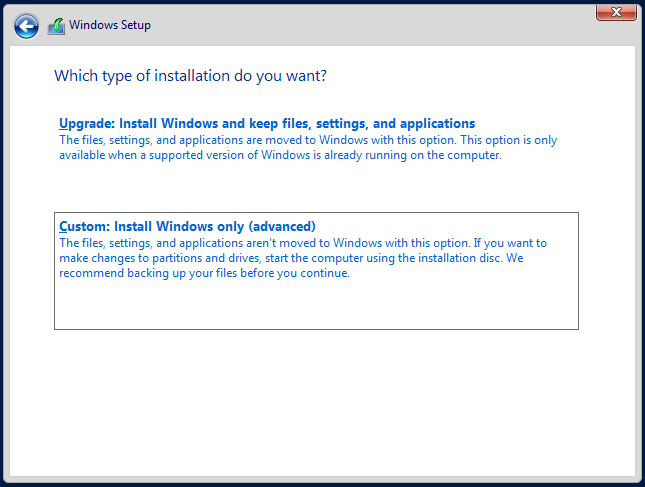
Select Custom: Install Windows only (advanced). Note: BWTST recommends performing a clean install of Windows Server 2019. If you do choose to upgrade you will need to start the installation directly from Windows.
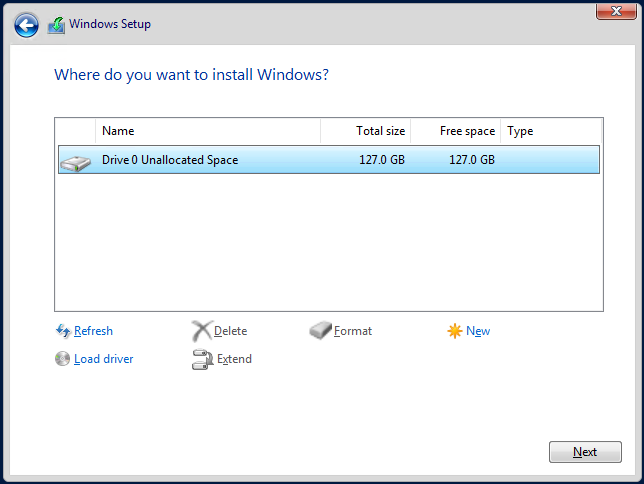
Select the drive or partition to install the OS. If you are reusing a drive, creating custom partitions, or need to load specific drivers for installation click Drive options (advanced). Click here for details on the minimum system requirements to install Windows Server 2016.
When you are satisfied with your drive settings click Next.
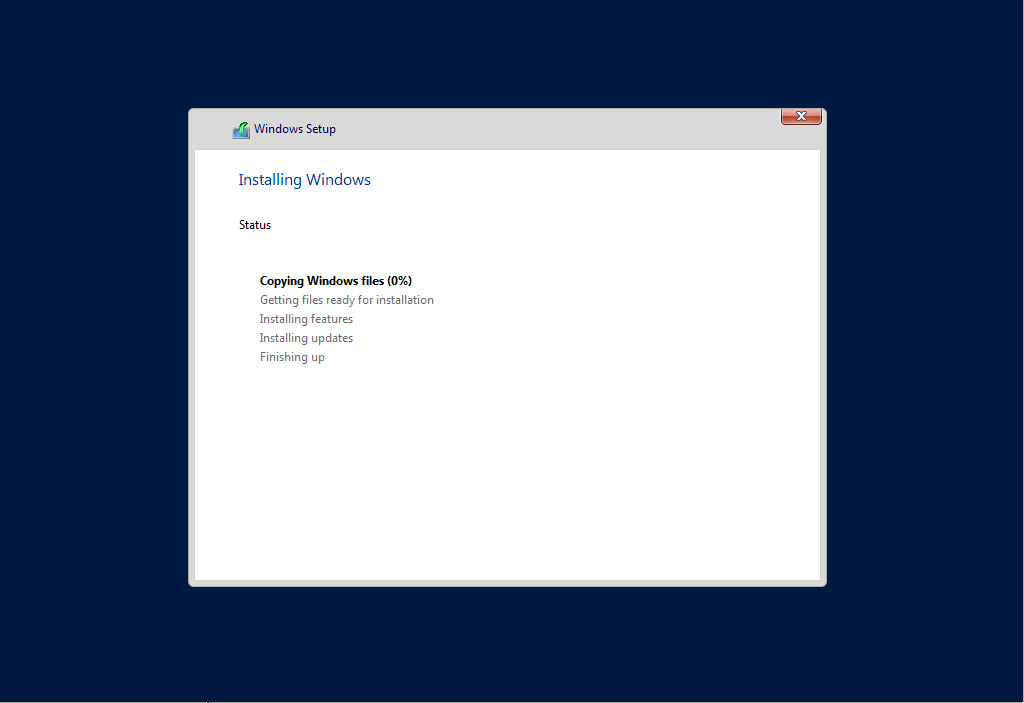
Installation will commence.
Configuration will continue after the server reboots.
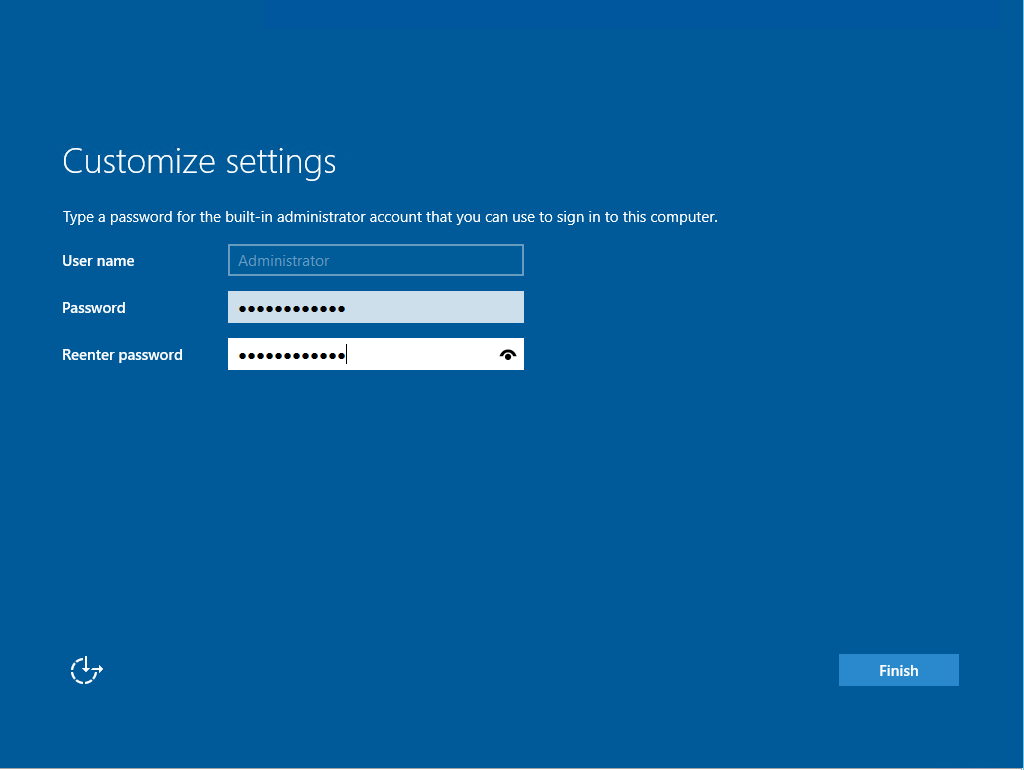
When setup completes change the Administrator password and click Finish.
Proceed to Post Installation.