
What is PowerShell
automation capability of a scripting language (such as VBScript). PowerShell combines the use of multiple tasks into one interface. PowerShell is a .Net based shell environment which utilizes objects (also known as Cmdlets) instead of
strings or regular expressions. In Windows PowerShell, every task that can be done from a GUI in Windows can be done with PowerShell; in one place. It is also a remarkable tool for system administrators and networking specialists since
it integrates well with Active Directory (AD) utilities. Whether you need to add 1000 users to a distribution group, or get the mac address from every machine within a specific OU, it can all be done with PowerShell. It can retrieve a
list of users from an AD and export them (with all their properties) as a csv file, or import a list of users from a csv or txt file to search. From AD to SharePoint and from MECM to SQL Server and just about everything in between,
PowerShell is a tool that can make utility management easier and more efficient.
What's new in PowerShell 5.0
PowerShell 5.0 will add all of the following features…
- Is backwards compatible with versions 4.0, 3.0 and 2.0
- Supports the creation of classes and can be structured as an object-oriented script
- Has a more dynamic information stream with two new common parameters and a preference variable that allows you to set a default preference for information stream data output
- Includes a new module, Microsoft.PowerShell.Archive, which allows you to compress files and folders in zipped files
- Has a new PackageManagement module which enables you to discover and install software packages over the internet from Windows PowerShell
- The Copy-Item Cmdlet allows you to copy items from a PowerShell session on one client to a PowerShell session on a remote client
- A Cryptographic Message Syntax Cmdlet allows you to encrypt and decrypt content by using IETF standard format
- Microsoft.PowerShell.Utility module now has Get-Clipboard and Set-Clipboard Cmdlets for easier transferrance of data between PowerShell sessions, which supports images, audio files, file lists and text.
- More robust debugging supports debugging one process while running another process, debugging nested functions and debugging remote sessions
- Supports multiple versions in one PowerShell module
- Windows PowerShell console now supports syntax coloring, like the PowerShell ISE
This list is only some of the new features included in Windows PowerShell 5.0. For a complete list of what’s new in PowerShell 5.0, please visit:
https://msdn.microsoft.com/powershell/scripting/whats-new/what-s-new-with-powershell
How to Save a PowerShell Script
and Save it to the directory of your choice.

Before saving, Select All Files at the bottom of the dialog in the “Save as type” drop-down box so that it does not save it as a .txt file. Instead of txt, add ps1 as the file extension.

Click ‘Save’
You have now saved a PowerShell script file.
How to Run a PowerShell Script
Running a PowerShell script file can be a little tricky…at first.
If you double click on a file with a .ps1 extension you will notice that instead of running the script, it opens for editing in Notepad or PowerShell ISE (whichever is the default on your system). This is a security feature to prevent
unwanted code from being executed.
A PowerShell script file needs to be run from either a PowerShell command window or PowerShell ISE (Integrated Scripting Environment). However, if you have never attempted to run a PowerShell script on your system before then there is
most likely still one more step to be completed. Every version of PowerShell has multiple execution modes for security purposes and the default is Restricted, which means PowerShell is in interactive mode and will not run any scripts.
To check the execution mode of PowerShell on your machine, open a PowerShell prompt or PowerShell ISE (as Administrator preferably) and type:
then press ‘Enter’.
If the result is Restricted then you will need to change it in order to run the script. Your choices are:
- Restricted: No scripts can be run. Windows PowerShell can be used only in interactive mode.
- AllSigned: Only scripts signed by a trusted publisher can be run.
- RemoteSigned: Downloaded scripts must be signed by a trusted publisher before they can be run.
- Unrestricted: No restrictions; all Windows PowerShell scripts can be run.
To run scripts created on your machine but disallow running scripts from anywhere else you would use RemoteSigned. To set it to RemoteSigned type:
and press ‘Enter’.
You will need to confirm your selection as shown in the image below:

Type ‘Y’ to approve the change and you will now be able to run scripts created from your machine.
To run a script, navigate to the directory where the script is located by typing set-location (or the shortcut cd can be used), and then the path, for example:
then press ‘Enter’.
To run the script type ‘.\’ plus the filename and extension, for example:
then press ‘Enter’.
If you need to run a script downloaded from the internet or from a UNC path, from a publisher that you trust, then you will need to set the execution policy to either AllSigned or Unrestricted depending on
whether the script file(s) are signed or not. But if you do set it to Unrestricted, be sure to set it back to Restricted or RemoteSigned once you have ran the code you downloaded.
How to check your version of PowerShell
and press ‘Enter’
You will get a result like the example shown below, though your version may be different:

The ‘Major’ result is the one that will tell you which version of PowerShell you currently have. Going by the example above, the current version is PowerShell 4.0.
Upgrading PowerShell
Windows 10: PowerShell version 5.0
Use one of the following tables to download and install the correct update for your system:
| Windows Management Framework 5.0 | |
|---|---|
| Operating System / Architecture | Package Name |
| Windows Server 2012 R2 | \\gs\di\BWTST\downloads\WindowsManagementFramework\WMF5.0\Win8.1AndW2K12R2-KB3134758-x64.msu.zip |
| Complete WMF 5.0 Package | \\gs\di\BWTST\downloads\WindowsManagementFramework\WMF5.0.zip |
| WMF 5 Release Notes | \\gs\di\BWTST\downloads\WindowsManagementFramework\WMF5.0\WMF 5 Release Notes.docx |
Basic PowerShell Commands
Get-Help
Use Get-Help for assistance with Cmdlet syntax or specific topics.
For example, type:
Type Get-Help plus a Cmdlet name to get more help about that Cmdlet.
For Example:
You can also use the -examples parameter withe the Get-Help Cmdlet to see specific examples.
For instance, type:
PowerShell will also output help about topics with the syntax Get-Help about_’topic’
For example:
Update-Help:
To make sure you have the latest Help Files, type:
Get-Service
For local computer:
For remote computer:
To get all services whose name begin with “Win”, Use the wildcard*, such as:
Local:
Remote:
For more examples with Get-Service, type:
Start,Stop-Service
To start a service type:
Then to Restart:
Output File Formats
Out-File
This command utilizes the pipeline “|” which is discussed more below.
Using “.\” in place of an absolute path will save the text file to the current PowerShell directory:
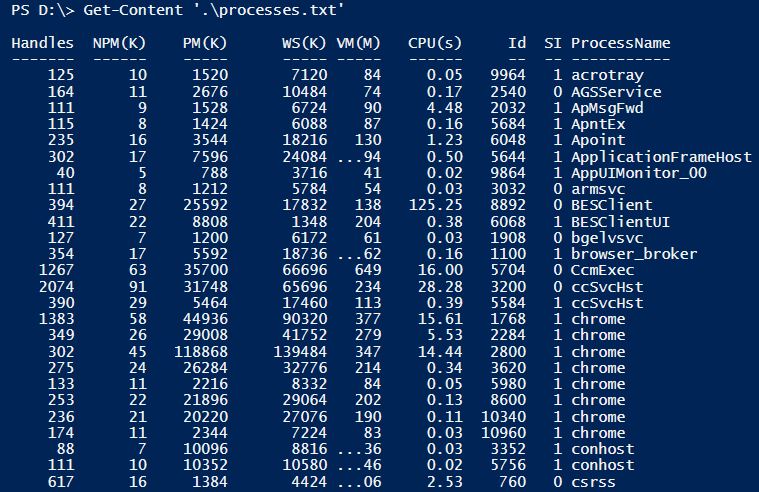
The contents of a txt file can then be retrieved by using Get-Content:
Export-Csv
In the resulting CSV file (shown below opened in MS Excel), notice the system information at the top:

The system type stamp can be omitted from the outputted csv file with the -NoTypeInformation parameter, For Example:
the shorthand version “-NoType” also works:
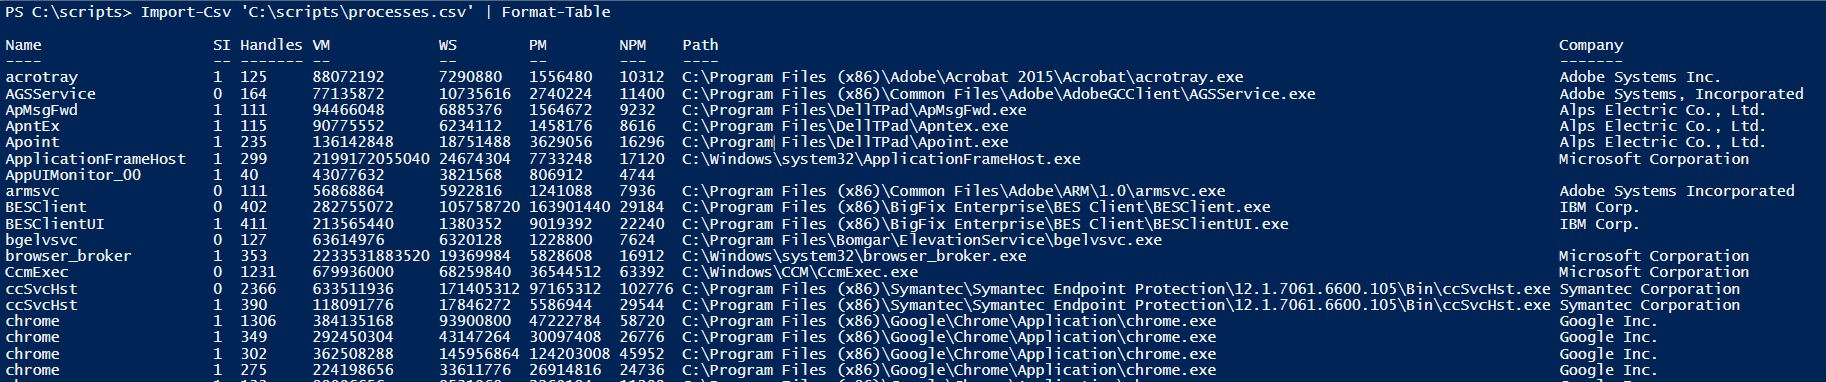
CSV information can then be retrieved by using Import-CSV:
FYI: listing the contents of processes.csv displays as list format, so we’ll use the Format-Table command to see a column view
Export-Clixml
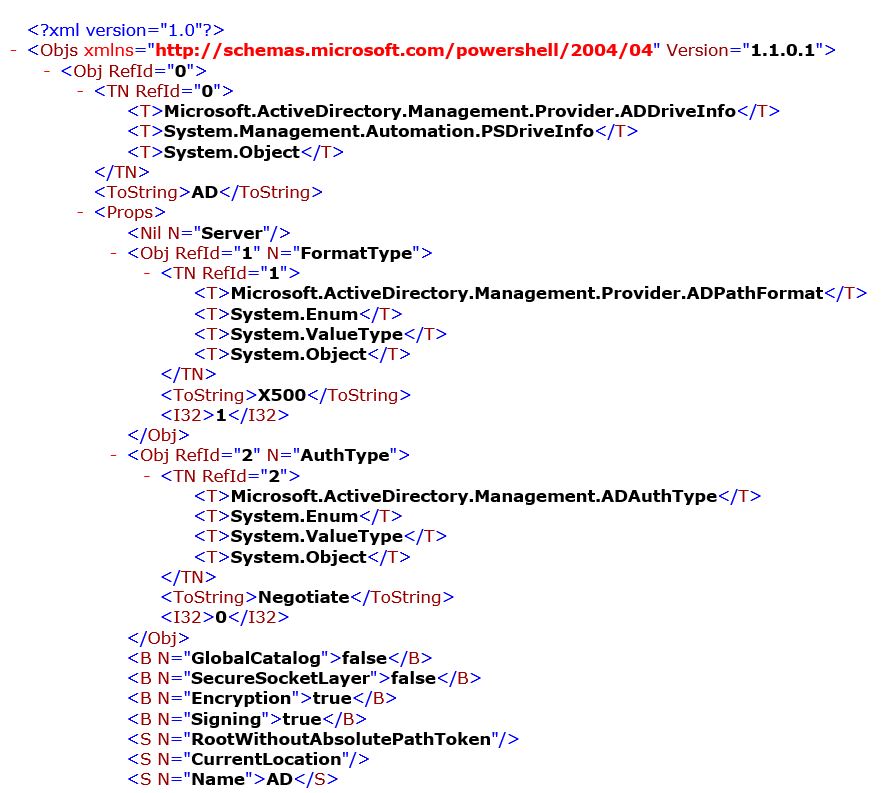
Output can also be saved as XML format by using Export-Clixml:
Here you can see a portion of the output from the resulting XML file:
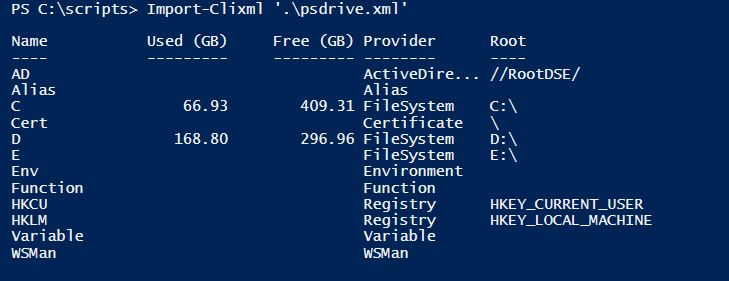
Similarly, XML data can be imported by using Import-Clixml:
The Pipeline
The command on the left is “piped” into the command on the right, using the Get-Service examples above, we can combine Get-Service and Stop-Service:
Multiple pipelines can be used as well:
Get-Member
Get-Member is a method to check the properties of a PowerShell object. For example, we could create an array such as:
$a = @(1, 2, 3, 4, 5).
However, if we wanted to know what methods we could invoke on this array we would use Get-Member:
$a | Get-Member
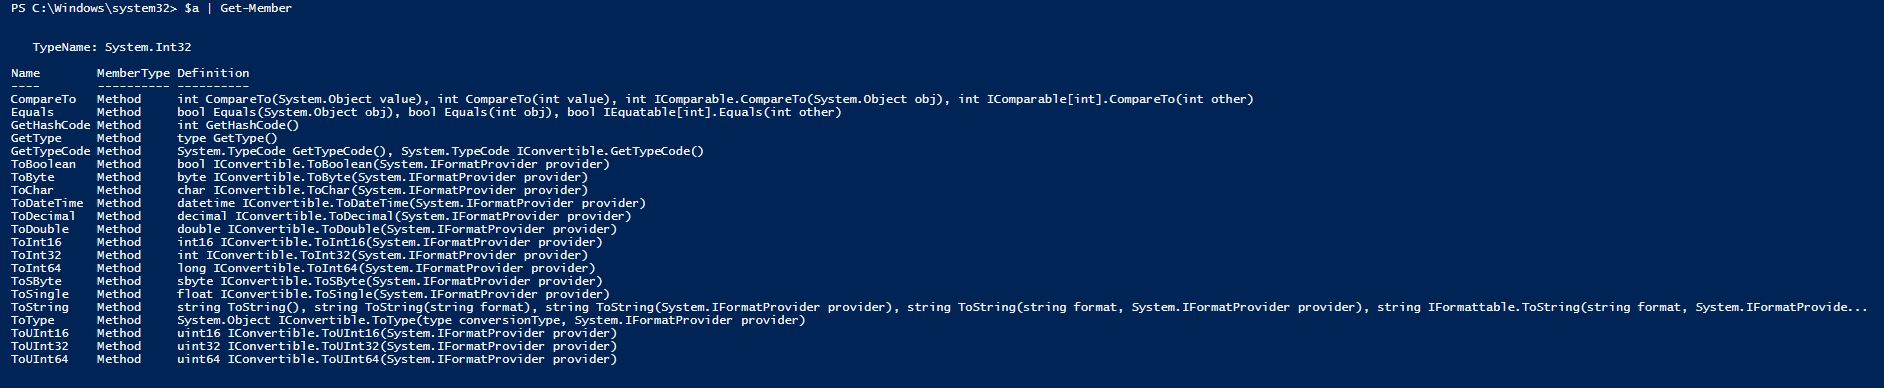 From the resulting outpout of Get-Member, we see that we have instantiated a System.Int32 type array
 ![]() and that we can invoke several conversion methods on it such as ToChar() or ToDateTime(), among others.
and that we can invoke several conversion methods on it such as ToChar() or ToDateTime(), among others.
Active Directory Commands
Import-Module ActiveDirectory
PowerShell comes with an Active Directory Module (which is needed to perform tasks in Active Directory) but it is not automatically loaded with each session. To check which Modules are currently loaded run the following command:
You will see output similar to the following:

If you look under the name column, you will notice there is not an Active Directory module loaded by default.
To load the Active Directory module, run the following command:
PowerShell will load the module as shown in the following image:

Now check the loaded modules again:
Look again at the Name column, you will now see the Active Directory Module loaded:

Get User Group Membership
replace ‘user’ with the user’s short name, for example:
This code will output the following:

It lists the Canonical Name of each group membership in a detailed list view, useful but not very readable…
Let’s dress this command up a little bit:
We’ll use the original command, Get-ADPrincipalGroupMembership ‘user’, and we’ll add a select statement telling it to only display the name and category of the group. Then we will tell it to sort by the group category in descending order so that it lists the Security Groups first. So here’s the code for that:
And the output…

Much more user friendly. You can even output it to a csv file so that it can be opened in MS Excel. Here’s the code for that:
(Don’t forget to replace my name with your own or whomever you are doing the lookup for)