The Advanced Group Policy Management (AGPM) console is available as part of the Microsoft Desktop Optimization Pack (MDOP) and is used for managing Group Policy Objects in Active Directory. This page will explain how to obtain and install AGPM.
System Requirements
A current version of AGPM is: 4.0 SP3. This version is required for Windows 10.
AGPM can be installed on Windows 10 systems and server OS.
AGPM requires that the Remote Server Administration Tools (RSAT) be installed with the Group Policy Management Tools feature enabled. RSAT is include included in current Win10 OS with a special PowerShell feature turn on process. Please look up current instructions from Microsoft as they are changing periodically.
In addition AGPM 4SP3 requires that .NET Framework 4.5.1, PowerShell 3.0 be installed.
Information about RSAT for Windows 10 can be found at https://tst.usgs.gov/operating-systems-2/windows-10/windows-10-remote-server-administration-tools/
Downloads
agpm_403_client_x86.exe (size 5,235 KB)
agpm_403_client_amd64.exe (size 8,539 KB)
Download the appropriate version, either 32- or 64-bit, for the system you will be installing AGPM on.
Install AGPM
Browse to the AGPM installation file. Right-click on the file and choose Run as administrator.

Provide administrator credentials and click to allow Microsoft AGPM to make changes.
The installer will prepare to install.
The setup wizard will start. Click .
Accept the license agreement and click .
Keep the default application path and click .
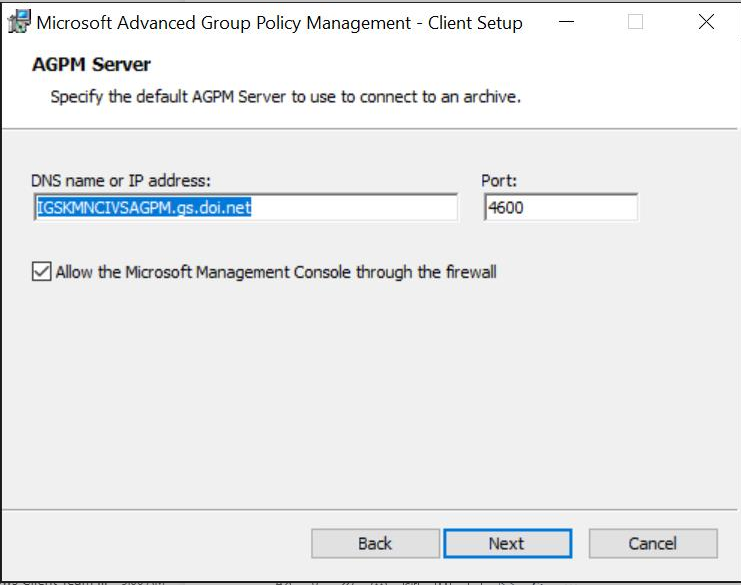
Enter IGSKMNCIVSAGPM.gs.doi.net for the DNS name and change the port to 4600. Leave the “Allow Microsoft Management Console through the firewall” box checked. Click .
Uncheck any unwanted languages and click .
Click to begin the installation. You can see which, if any, additional Windows components are going to be installed by clicking the Details button.
The installation process will begin.
Click to complete the installation.
Change Control will now be available in the Group Policy Management console (gpmc.msc).
The Group Policy Management Console (GPMC), by default, points to the Domain Controller (DC) with the Operation Master Token (PDC Emulator role). If this Operation Master Token DC is not the closest primary DC to the OU resources, then when resources are pre-staged in Enterprise Active Directory (eAD), or when Group Policy Objects are linked, there will be delays due to replication. Change the Group Policy Management Console (GPMC) so that it points to the closest primary eAD Domain Controller.
If you have issues connecting to AGPM, please try the below. There seems to be some caching issues causing the GPO to not update on some systems without a direct login.
- Login directly to your computer with your OU account using PIV card using PIN+pwdhint
- Connect to VPN if not in the office.
- Open up powershell/cmd and enter “gpupdate /force”
- Once complete, open gpmc.
- You can then sign out of OU account, back into standard account and use runas to open gpmc/agpm.
If your AGPM install is still pointing to the old server, you can to manually update via regedit and set hostname/port: Computer\HKEY_USERS\SID-of-your-OU-account\Software\Policies\Microsoft\AGPM