DHCP is an Internet Engineering Task Force (IETF) standard designed to reduce the administration burden and complexity of configuring hosts on a TCP/IP-based network, such as a private intranet. Using the DHCP Server service, the process of configuring TCP/IP on DHCP clients is automatic.
DHCP in Windows Server 2022 provides the following:
1. DHCP Subnet Selection Options
DHCP now supports option 82 (sub-option 5). You can use this option to allow DHCP proxy clients and relay agents to request an IP address for a specific subnet.
If you are using a DHCP relay agent that is configured with DHCP option 82, sub-option 5, the relay agent can request an IP address lease for DHCP clients from a specific IP address range.
2. New Logging Events for DNS Registration Failures by the DHCP Server
DHCP now includes logging events for circumstances in which DHCP server DNS record registrations fail on the DNS server. DHCP integration with DNS enables DNS resource records to be dynamically updated for new computers and devices, or when IP addresses of existing devices change on the network.
Adding a DHCP Scope and Configuring Options
DHCP Wireless Access Point Setup
Background Information
DHCP Basics
A DHCP enabled client obtains a lease for an IP address from a DHCP server. Before the lease expires, the DHCP server must renew the lease for the client or the client must obtain a new lease. Leases are retained in the DHCP server database approximately one day after expiration. This grace period protects a client’s lease in case the client and server are in different time zones, their internal clocks are not synchronized, or the client is off the network when the lease expires. A scope must be defined and activated before DHCP clients can use the DHCP server for dynamic TCP/IP configuration. A DHCP scope is an administrative collection of IP addresses and TCP/IP configuration parameters that are available for lease to DHCP clients. The network administrator creates a scope for each logical or physical subnet. Each subnet can have a single DHCP scope with a single continuous range of IP addresses. To use several address ranges within a single scope or subnet, you must first define the scope and then set exclusion ranges.
DHCP server
Windows 2022 server with the DHCP server role installed.
DHCP client
Any computer that has DHCP settings enabled.
Scope
The full, consecutive range of possible IP addresses for a network. DHCP services can be offered to scopes, which typically define a single physical subnet on a network. DHCP servers primarily use scopes to manage network distribution and assignment of IP addresses and any related configuration parameters.
Superscope
An administrative grouping of scopes that are used to support multiple, logical IP subnets on the same physical subnet. Superscopes contain a list of member scopes (or child scopes) that can be activated as a collection.
Exclusion range
Ensures that any IP address listed in that range is not offered by the DHCP server to any DHCP clients.
Address pool
Available IP addresses form an address pool within the scope. Pooled addresses are available for dynamic assignment by the DHCP server to DHCP clients.
Lease
The length of time, specified by the DHCP server, a client computer can use a dynamically assigned IP address. When a lease is made to a client, the lease is considered active. Before the lease expires, the client renews its lease with the DHCP server. A lease becomes inactive when it either expires or is deleted by the server. The lease duration determines when the lease expires and how often the client needs to renew its lease with the DHCP server.
Reservation
Creates a permanent address lease assignment from the DHCP server to the client. Reservations ensure that a specified hardware device on the subnet can always use the same IP address. This is useful for computers such as remote access gateways, WINS, or DNS servers that must have a static IP address.
Option types
Other client configuration parameters a DHCP server can assign when offering an IP address lease to a client. Typically, these option types are enabled and configured or each scope. Most options are predefined through RFC 2132, but you can use DHCP Manager to define and add custom option types as needed.
Option class
A way for the DHCP server to further submanage option types provided to clients. Option classes can be configured on your DHCP servers to offer specialized client support. When an option class is added to the server, clients of that class can be provided class-specific option types for their configuration.
How the process works:
The first time a DHCP-enabled client starts and attempts to join the network; it automatically follows an initialization process to obtain a lease from a DHCP server.
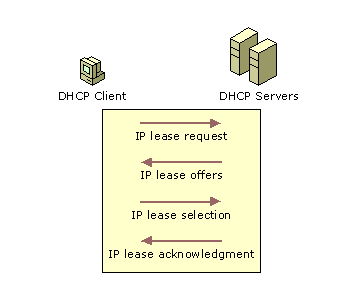
- The DHCP client requests an IP address by broadcasting a DHCPDiscover message to the local subnet.
- The client is offered an address when a DHCP server responds with a DHCPOffer message containing an IP address and configuration information for lease to the client. If no DHCP server responds to the client request, the client can proceed in two ways:
- The client can self-configure an IP address for its interface.
- The client network initialization can fail. The client continues to resend DHCPDiscover messages in the background (four times, every 5 minutes) until it receives a DHCPOffer message from a DHCP server.
- The client indicates acceptance of the offer by selecting the offered address and replying to the server with a DHCPRequest message.
- The client is assigned the address and the DHCP server sends a DHCPAck message, approving the lease. Other DHCP option information might be included in the message.
- Once the client receives acknowledgment, it configures its TCP/IP properties using any DHCP option information in the reply and joins the network.
Installation
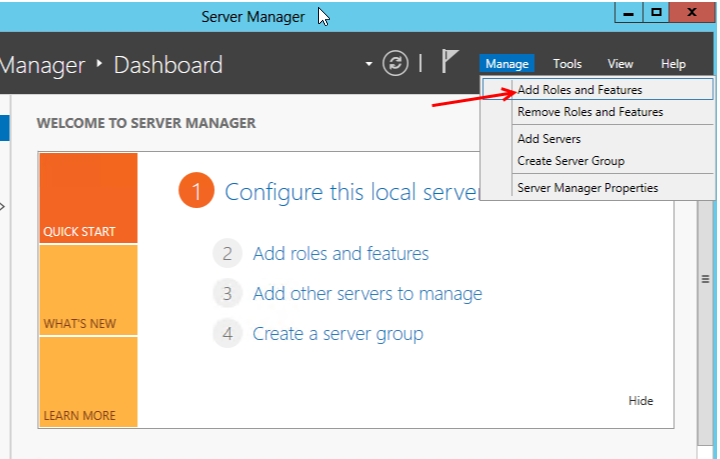
Open Server Manager and click Manage -> Add Roles and Features.
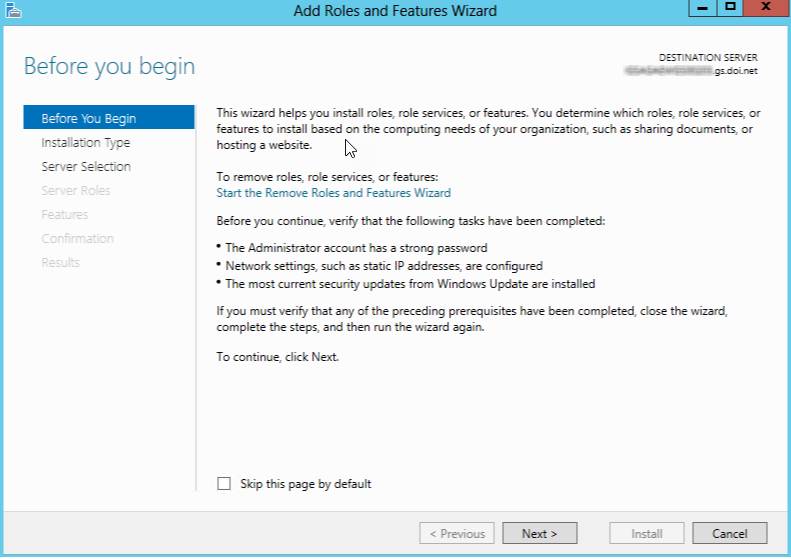
Click Next.
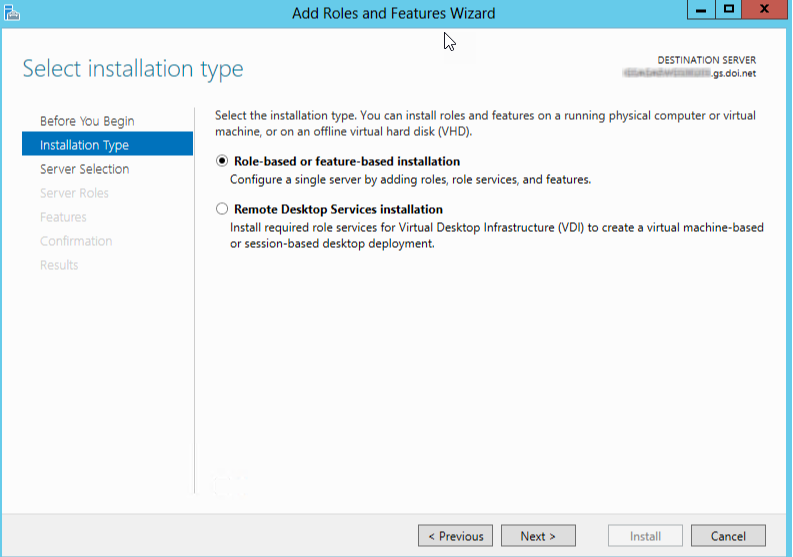
Select Role-based or feature-based installation and click Next.
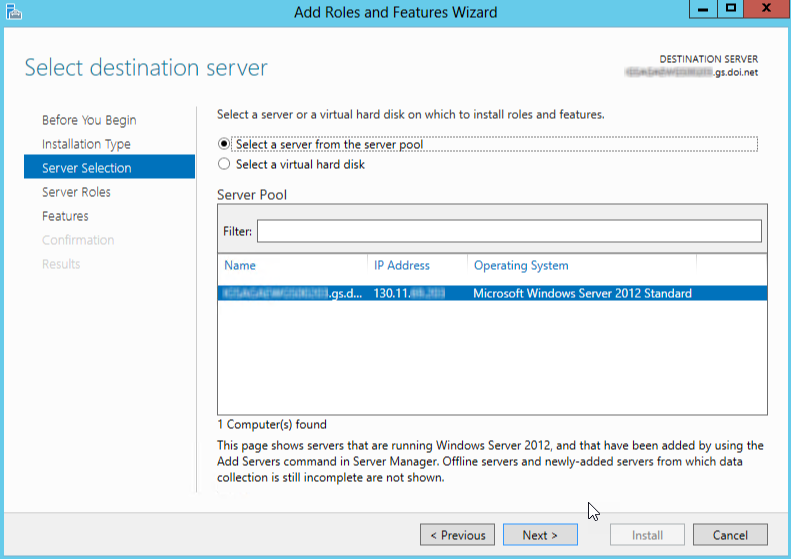
Select the server where the DHCP Server role will be installed and click Next.
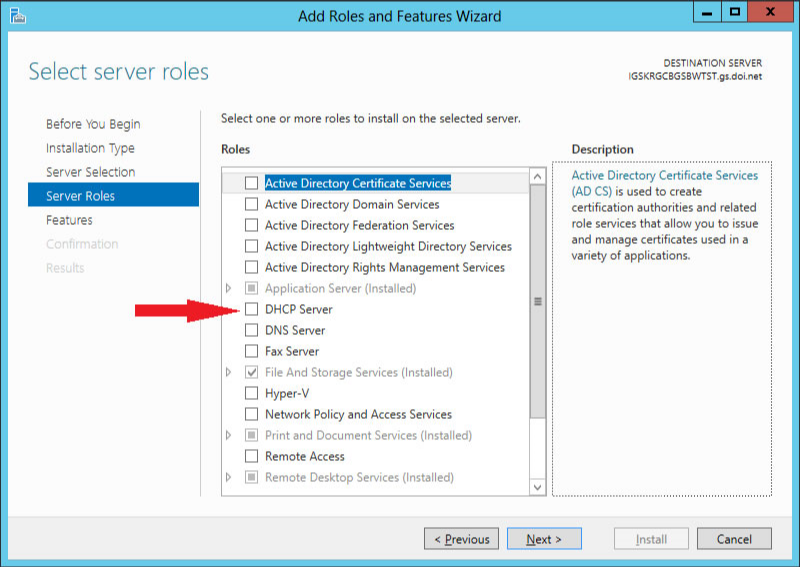
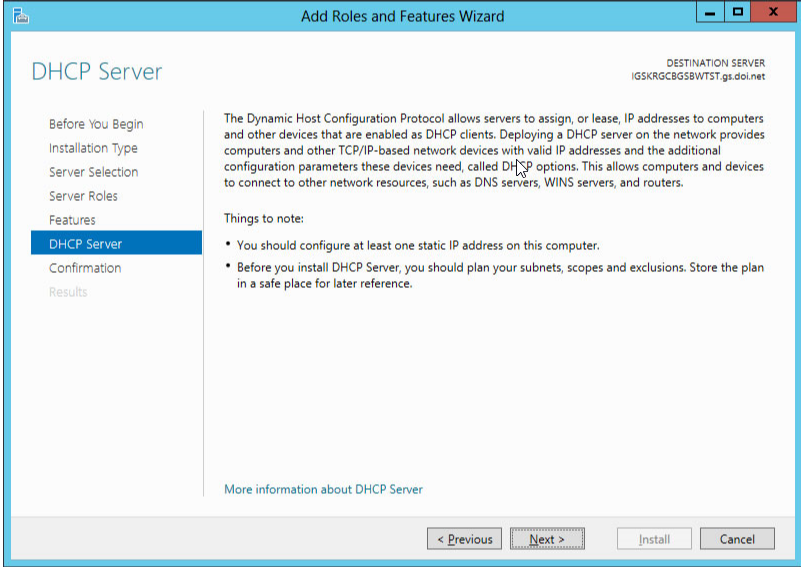
Check the box next to DHCP Server.
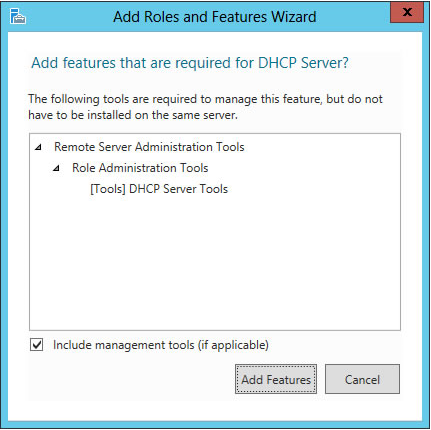
This box will automatically open. Click Add Features to install the DHCP Server Tools to the selected server then click Next.
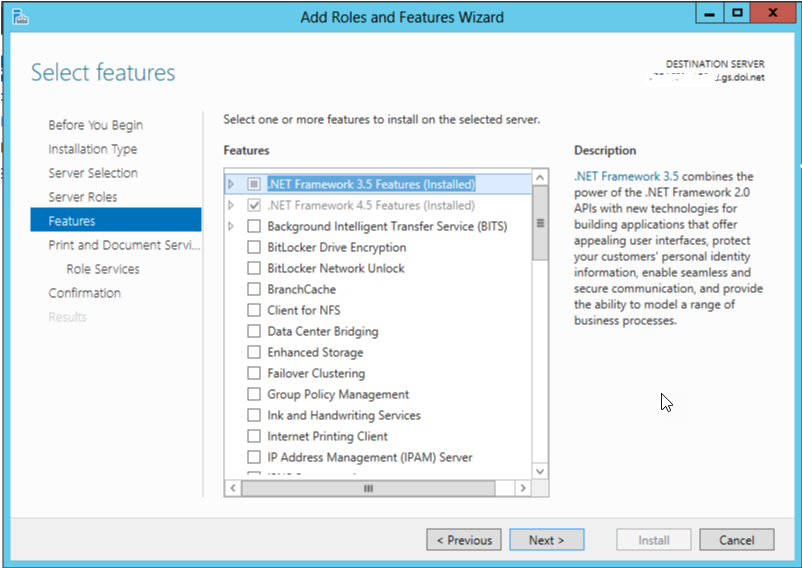
No other features are necessary. Click Next to continue.
Click Next to continue.
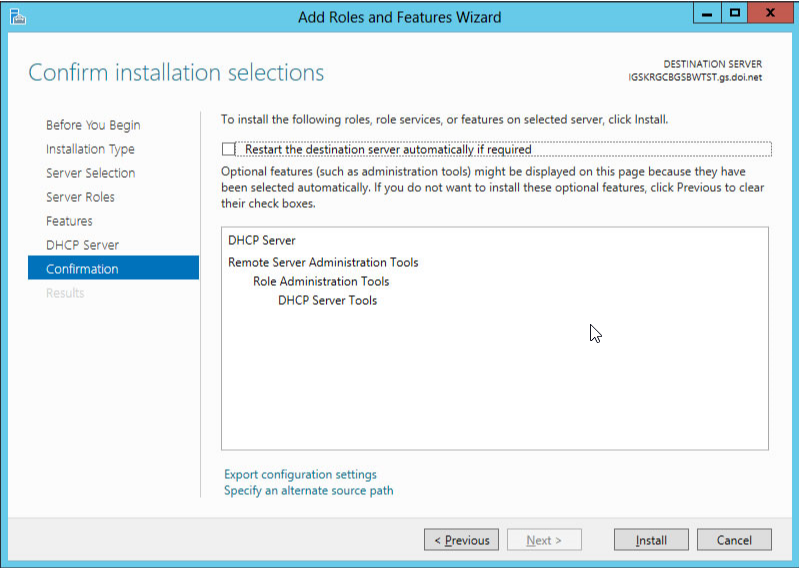
To begin the installation, click Install.
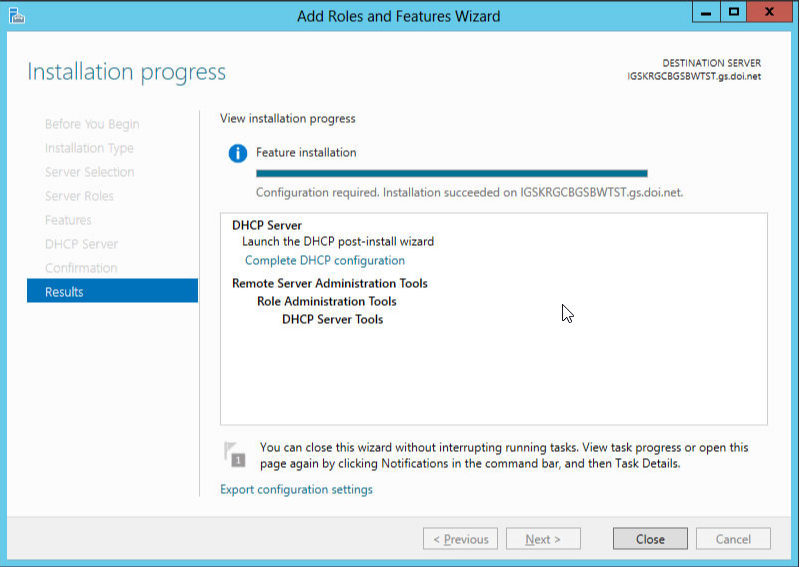
Click Close to complete installation.
Adding a DHCP Scope and Configuring Options
We now need to configure the scope options.
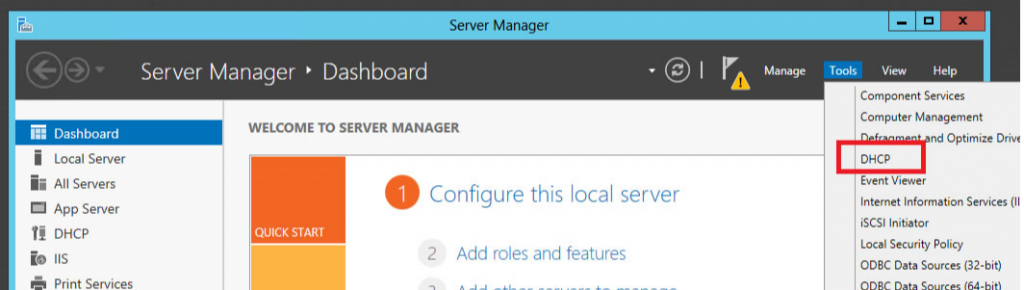
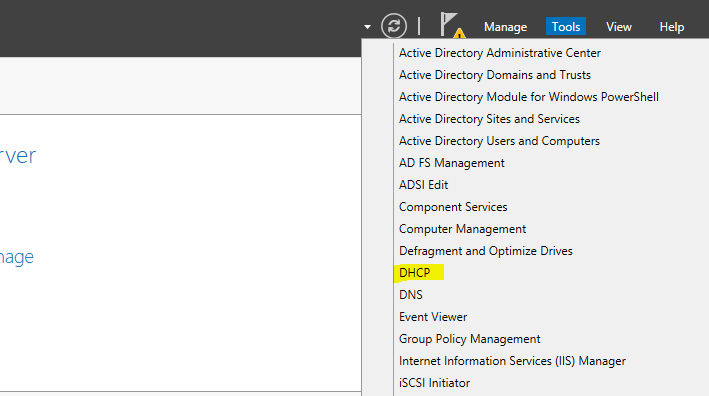
From the Server Manager window, select Tools and then DHCP to bring up the DHCP Management console.
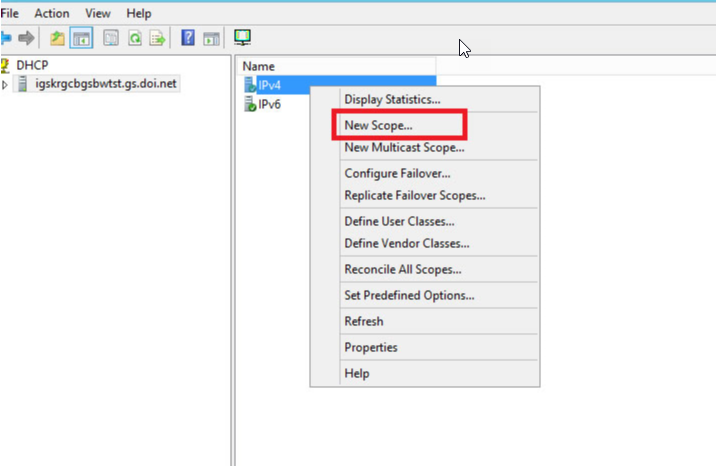
Now create a new scope by right-clicking on IPv4 and selecting New Scope.
Click Next in the New Scope Wizard window.
Give your scope a name. Then click Next.
Now we need to tell this DHCP server what range of IP addresses we want it to hand out to DHCP clients.
For demonstration, we will be handing out IP addresses in the range of 192.168.1.50– 192.168.1.100 but you will need to know the desired IP Address Range for your network. Ensure that the Subnet information is correct for your network as well.
Fill in the Start and End range, then select Next.
If you have any IP addresses within the scope range that you want/need to exclude, enter them in the Add Exclusions and Delay window, then select Next.
For the Lease Duration, leave the defaults and select Next.
The next window allows you to configure the scope options such as:
Select Yes, I want to configure these options now, and then select Next.
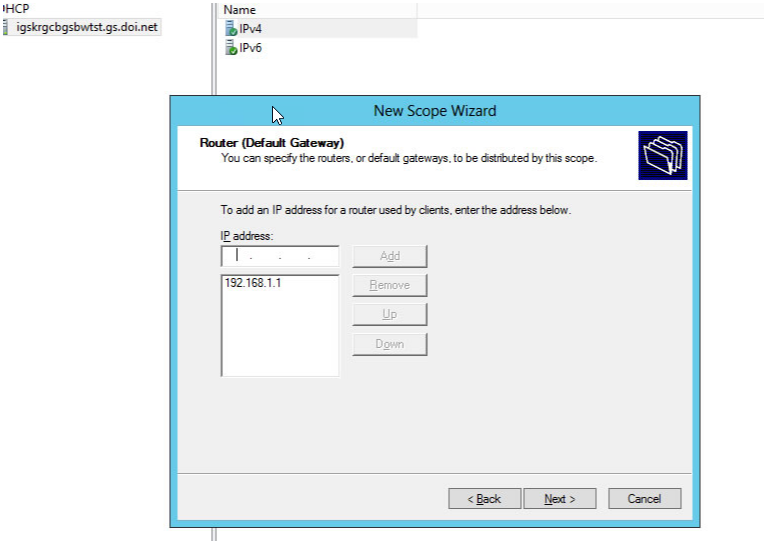
Input the router’s (Default Gateway) IP address, select Add, then select Next.
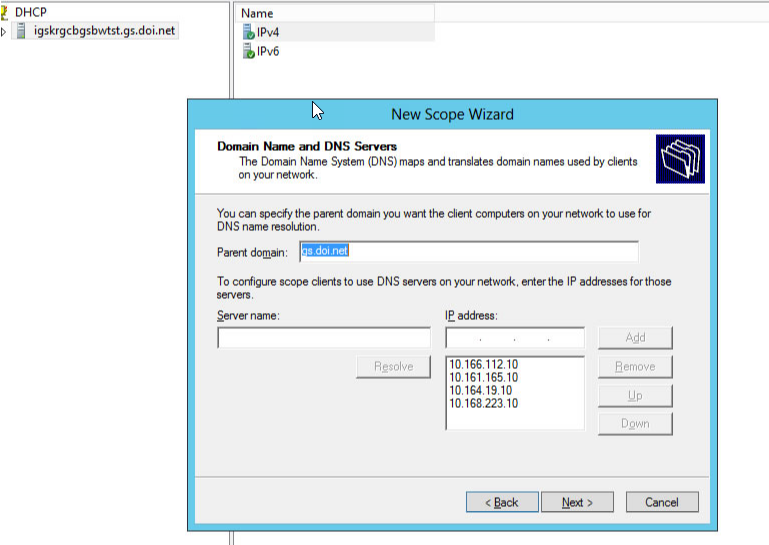
The next screen is where we input our DNS server IP address(es) You will need to know the correct DNS Server Addresses for your office.
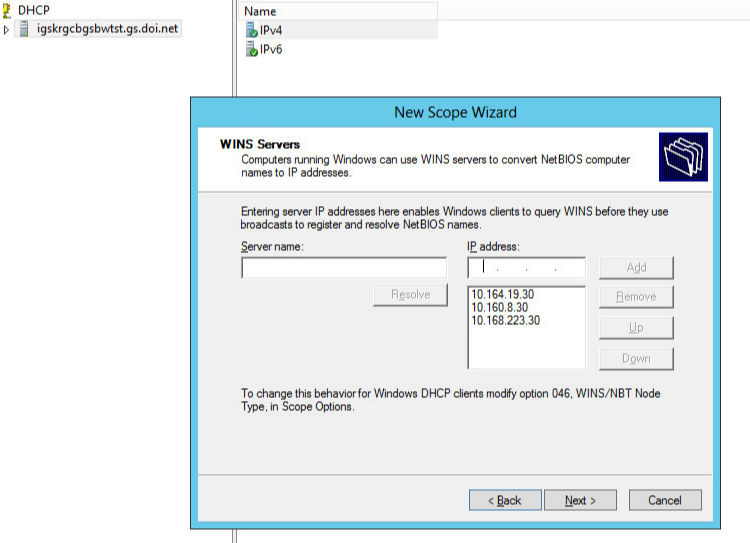
For WINS, input the correct IP addresses, select Add, then select Next.
Select Yes, I want to activate this scope now, and select Next.
Then select Finish at the Completing the New Scope Wizard window.
Authorize DHCP Server
The final step is to authorize the server.
Submit a ticket to the Domain Admins via the Service Desk including the hostname and IP address of the server to requesting DHCP Server authorization. If the IP address of the server has been used for a DHCP server in the past, the authorization may still be in place but in order to support both DNS and Enterprise SIEM requirements, additional steps must be completed by ACIO teams.
Once the server has been authorized you should see green check marks next to IPv4 and IPv6.
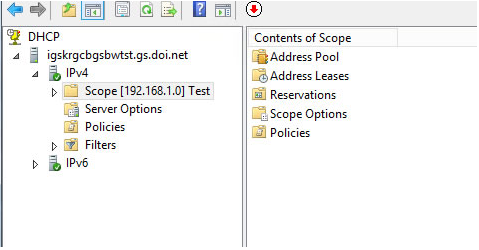
If you boot up a client that has DHCP enabled, you can see it within the Address Leases section.
Expand IPv4, then Scope, then click on Address Leases. You might have to right-click Adress Leases and select Refresh to see the changes.
Migrating a DHCP Scope
Migrating a DHCP scope from an old DHCP server to a new one is fast and easy thanks to a couple of PowerShell Cmdlets: Export-DhcpServer and Import-DhcpServer. Follow the steps below to migrate your server:
– Install the DHCP Server role on the new 2022 Server, but don’t Configure or Authorize it.
– Open a PowerShell prompt as an admin on the 2022 server. Make sure the account has admin rights on both the old and new server. Run the following cmdlet: Export-DhcpServer -ComputerName <old DHCP server name> -File <path to save the export file.xml> -ScopeId (optional – the default is to export all scopes) <ID of particular scope to export>
– When it finishes exporting, run ImportDhcp-Server -ComputerName <new DHCP server name> -File <path to the saved export file.xml> -BackupPath <path to backup current DHCP server database>
– Open the DHCP Management Console on 2022 server and your scope should be visible. Authorize it and stop the DHCP service on your old server.
There are other Cmdlet parameters you can include to customize the export/import process. Click here for more details.
Link Layer-Based Filtering
Link layer-based filtering was added in Server 2008 R2 and provides an additional layer of security on the network and allows administrators to filter incoming DHCP Requests to a DHCP Server based on the MAC Address of the DHCP client.
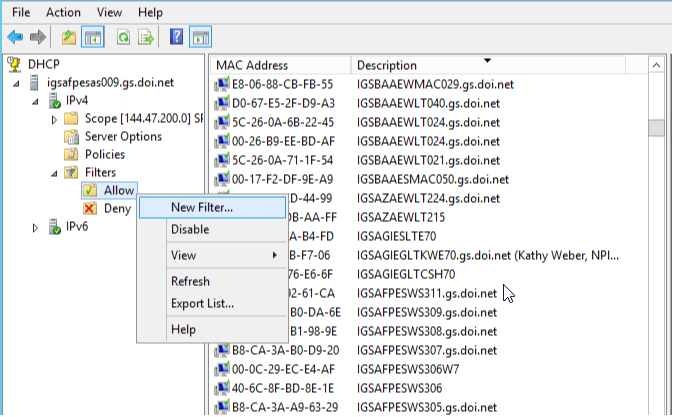
To manually create a new filter, expand the Filters node under IPv4, right-click the desired filter (Allow or Deny), then click New Filter.
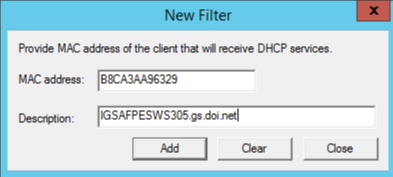
Type the MAC address and a description for the client, then click Add.
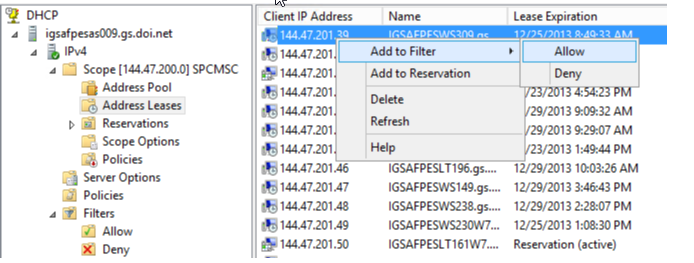
To add an existing client to a filter, locate the client listed in Address Leases, right-click on the client, then click Add to Filter and select the desired filter.
In addition, you can use Add-DhcpServerv4Filter cmdlet to import/update filters. The Add-DhcpServerv4Filter cmdlet adds the specified MAC address filter to the Dynamic Host Configuration Protocol (DHCP) server service. The MAC address can be added to the allow list or the deny list. This can be used in conjunction with the Import-Csv cmdlet for bulk updates to the filter:
Import-Csv \\<filepath>MAC_filters.csv | Add-DhcpServerv4Filter -force -ComputerName <servername>
DHCP IP Helper Address
Sites with a VoIP phone system can leverage their DHCP server to provide leases to IP phones. Because the DHCP server and IP phones are usually on different subnets, an IP helper needs to be configured on the site’s router.
To request an IP helper be added to your router config, open a ticket with the Service Desk and request that they assign it to the Telecom team. Provide the information below:
- The IP address of your DHCP server
- Your site location or router IP
DHCP Setup for Enterprise Wifi
USGS Telecom office will provide guidance on DHCP setup for Enterprise Wifi.
USGS Enterprise WiFi – USGS Technical Support Teams
DHCP Automatic Scope Backup
Windows Server will automatically backup the DHCP scope every 60 minutes by default.
To view the backup settings, log into the server as admin.
Then open Server Manager > DHCP.
Once mmc loads, right click on the server node and click Properties.

In the new window you can see it shows backup the path as C:\Windows\system32\dhcp\backup. This is the default path. But you can change it to local folder or network share. Click on browse to select the new path. Once the new path is set click on ok.

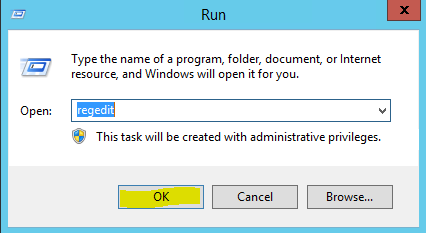
Administrators can change the backup interval. To do that we need to do some registry key edit. To open the registry mmc, go to Run > regedit.
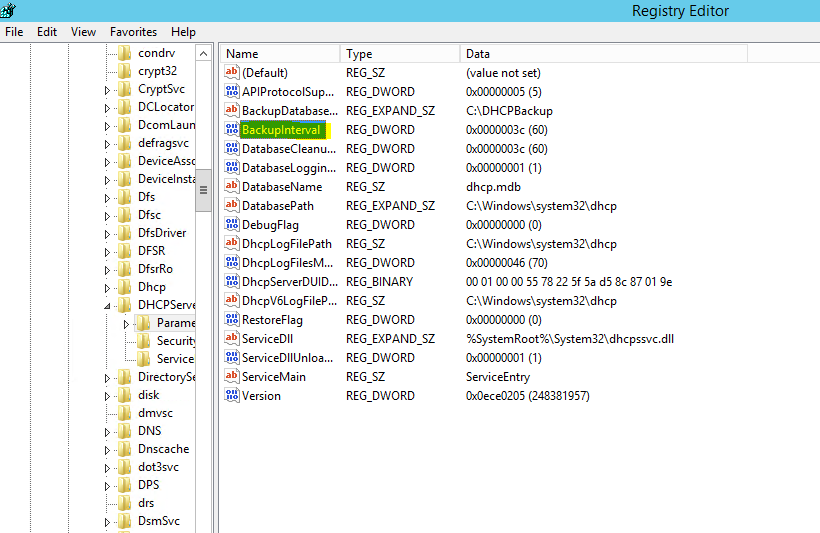
Go to path HKEY_LOCAL_MACHINE\SYSTEM\CurrentControlSet\Services\DHCPServer\Parameters
In there you will be able to see a key called BackupInterval.
To edit the value double click on it, and then once open select, decimal value option.
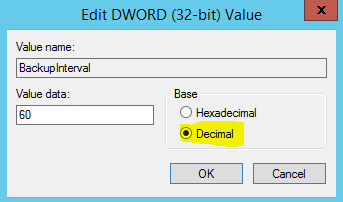
As you can see default value is 60, to change it type the value you need (the value represents the number of minutes) and press ok.
DHCP Manual Scope Backup
Open the DHCP Administration Console
Right Click the Server and Select Backup
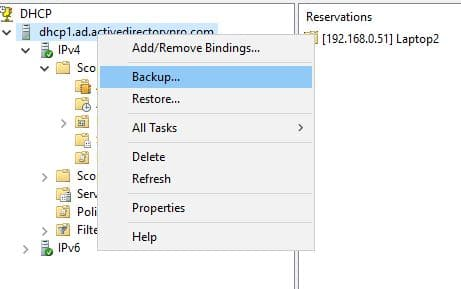
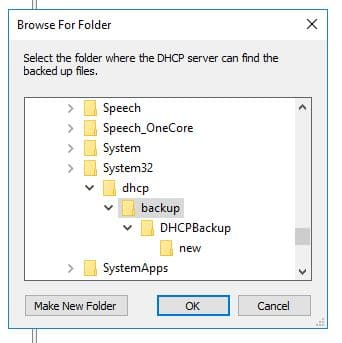
Select the desired backup folder. Then click OK.
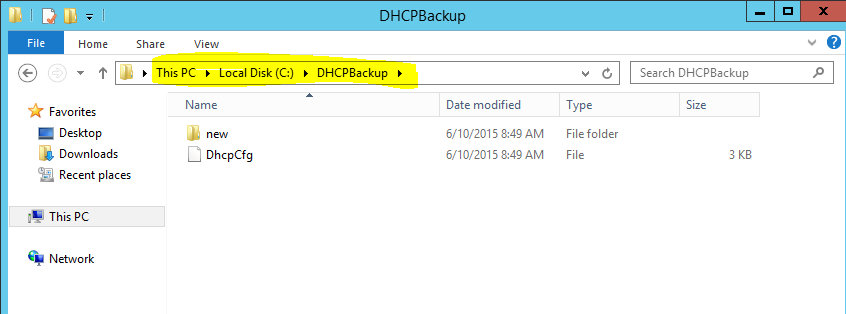
To verify scope backup, navigate to the folder you saved the backup in and confirm the DHCPCgf file exists.
DHCP Manual Scope Backup using PowerShell
Open PowerShell as Administrator on server
Type the following command:
Backup-DhcpServer -path c:\DHCPBackup
If you want to back up the DHCP server from a remote computer, use this command.
Backup-DhcpServer -ComputerName “dhcp1” -Path “C:\DHCPBackup”
DHCP Scope Restore
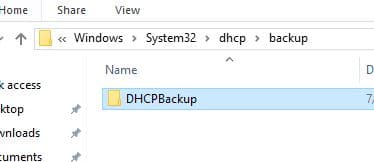
Copy Backup to %SystemRoot%System32\DHCP\backup
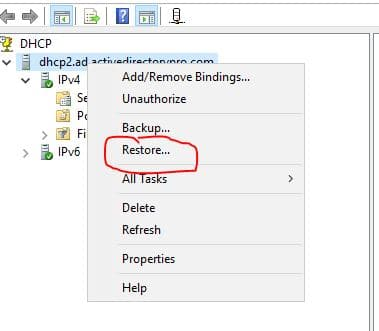
Open DHCP on Server. Right click server and select Restore.
Select DHCP Backup folder
You will get a message that says the service must be stopped and restarted.
Click Yes
Restore is complete.

You can go browse the scopes to verify everything restored correctly.
DHCP Scope Restore using PowerShell
Copy the DHCP Backup folder you created to “C:Window\ssystem32\dhcp\backup” or you will get permission errors.
PS C:> Restore-DhcpServer -ComputerName “<server name>” -Path “C:Windows\system32\dhcp\backup”
DHCP Troubleshooting
Clients Cannot Obtain an IP Address
If a DHCP client does not have a configured IP address, it typically indicates that the client was not able to contact a DHCP server. This issue can be caused by a network problem, or because the DHCP server is unavailable. When the DHCP server started and other clients can obtain valid addresses, verify that the client has a valid network connection and that all the related client hardware devices (including cables and network adapters) are working properly.
The DHCP Server Is Unavailable
When a DHCP server does not provide leased addresses to clients, it is frequently because the DHCP service did not start. In this case, the server may not be authorized to operate on the network. If you were previously able to start the DHCP service, use Event Viewer to check the System log for any entries. These logs may explain why you cannot start the DHCP service.
To restart the DHCP service:
1. Click Start, and then click Run.
2. Type cmd, and then press ENTER.
3. Type net start dhcpserver, and then press ENTER.
-or-
1. Click Start, point to Control Panel, point to Administrative Tools, and then click Computer Management.
2. Expand Services and Applications, and then click Services.
3. Locate and then double-click DHCP Server.
4. Verify that Startup is set to Automatic and that Service Status is set to Started. If not, click Start.
5. Click OK, and then close the Computer Management window.