Microsoft SQL Server is a relational database management system (RDMS). This page is intended to provide general guidance on licensing, installing, and securing Microsoft SQL Server. The current version at the time of writing is SQL Server 2019.
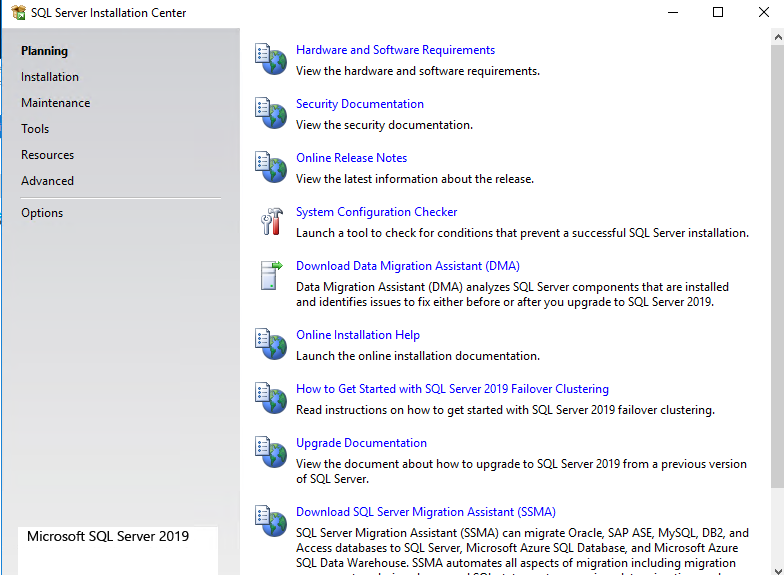
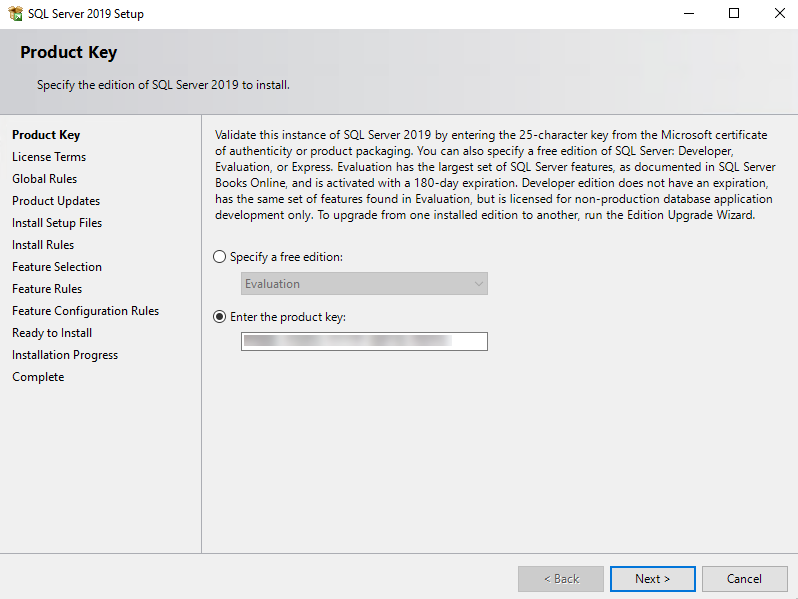
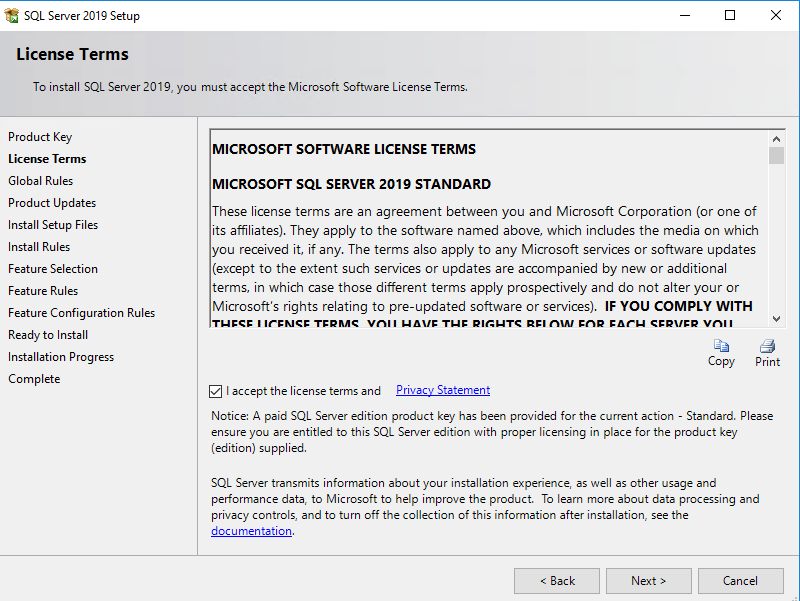
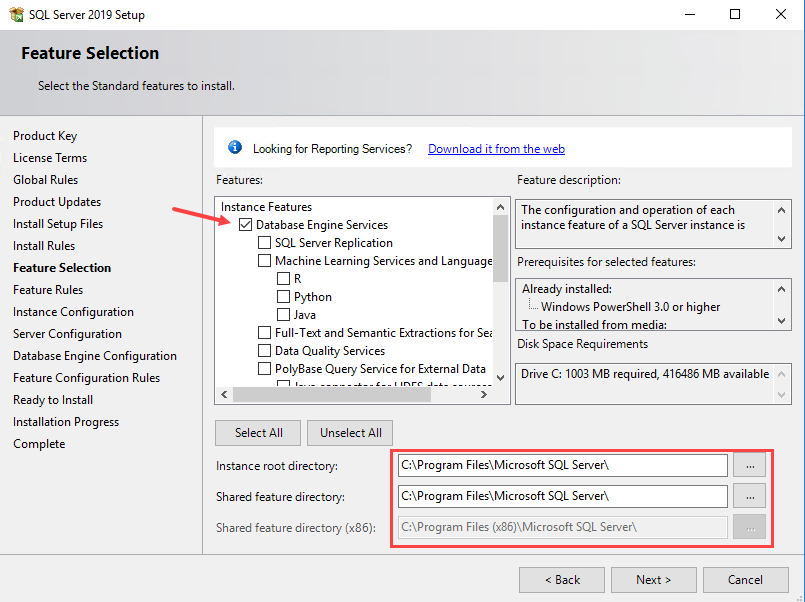
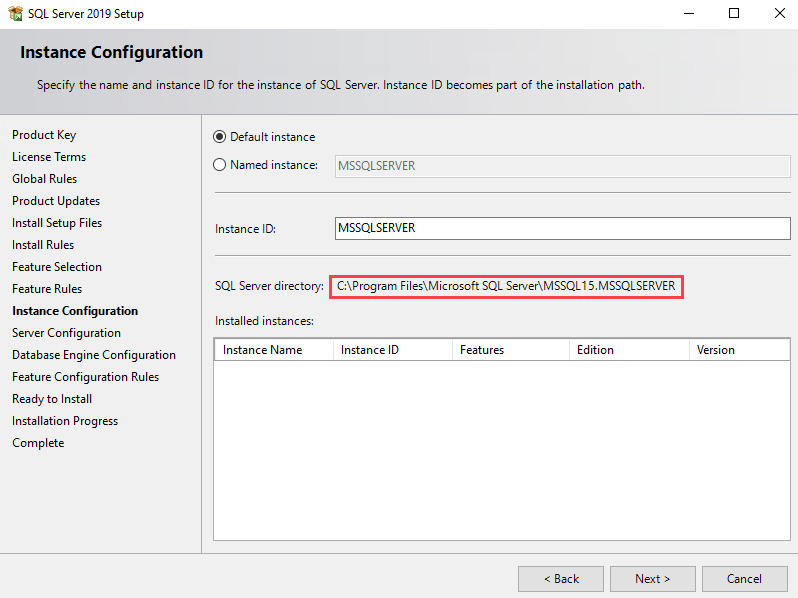
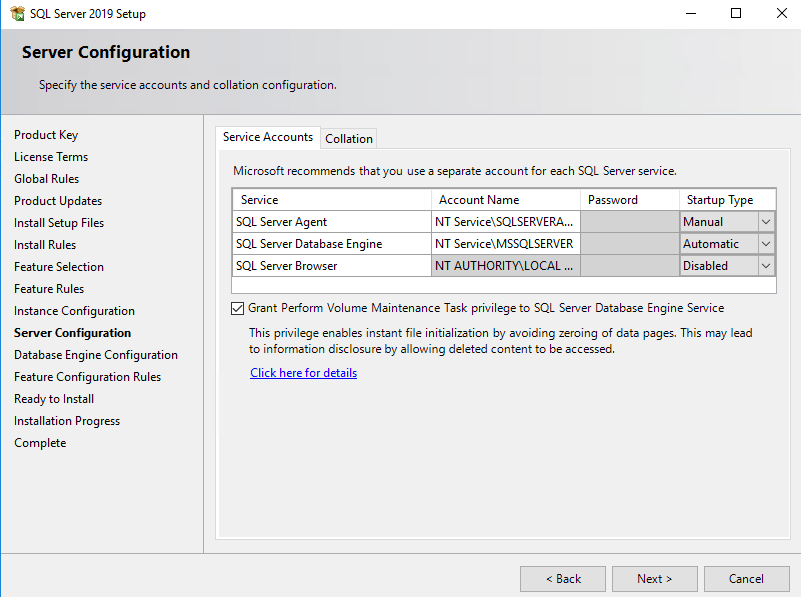
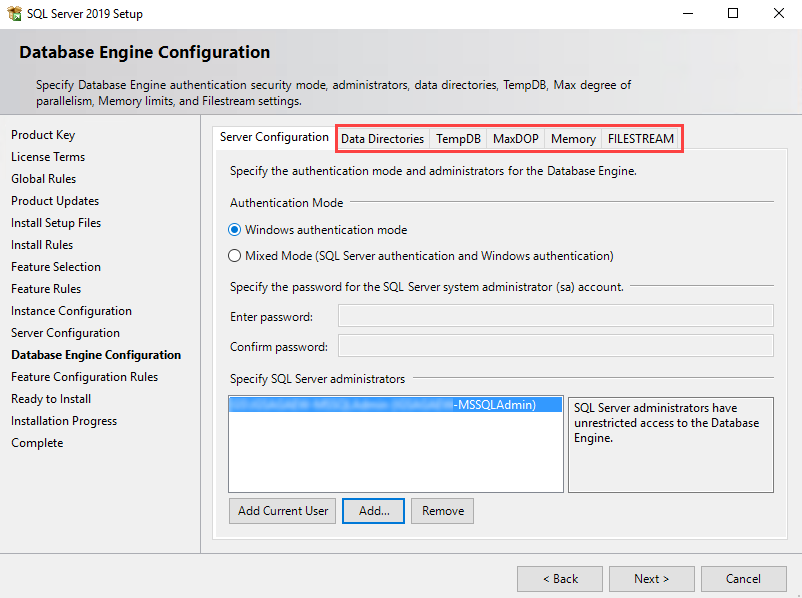
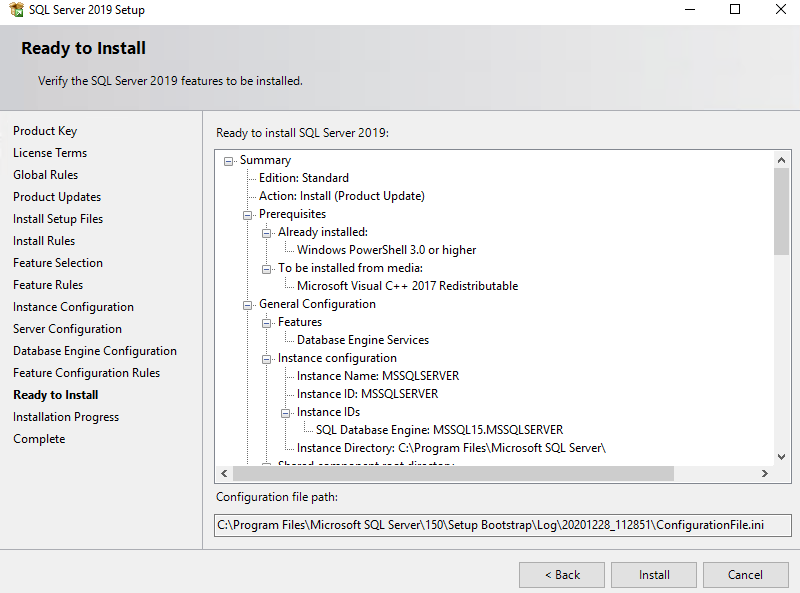
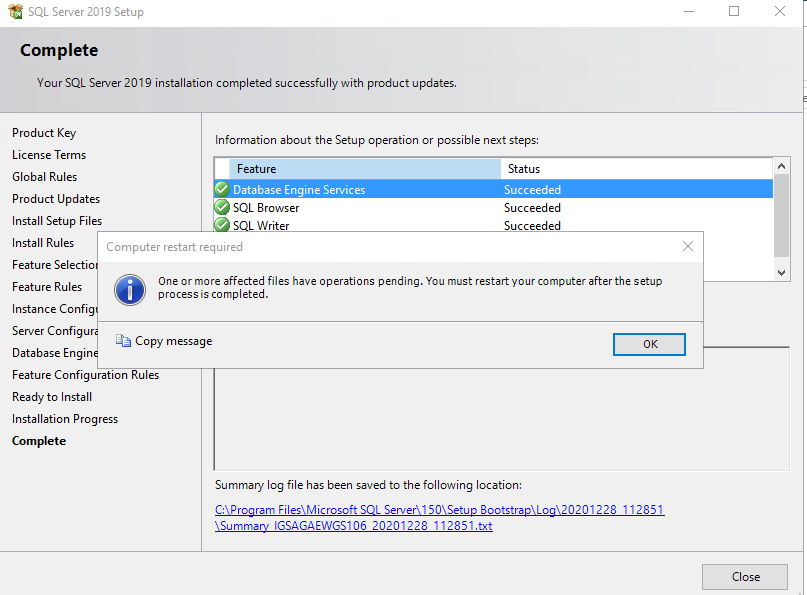
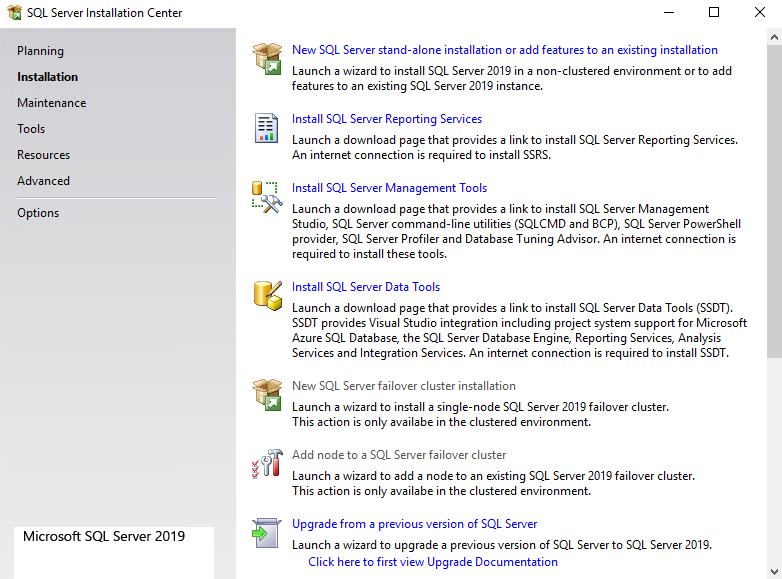
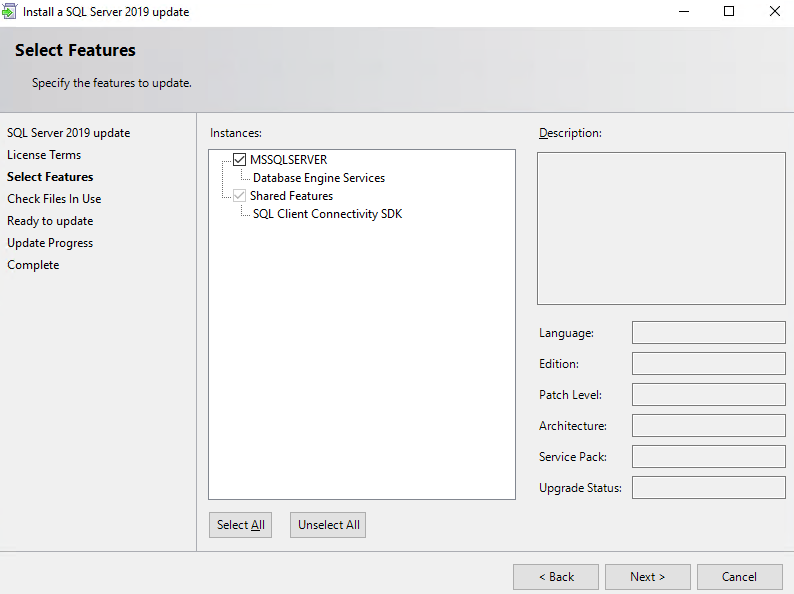
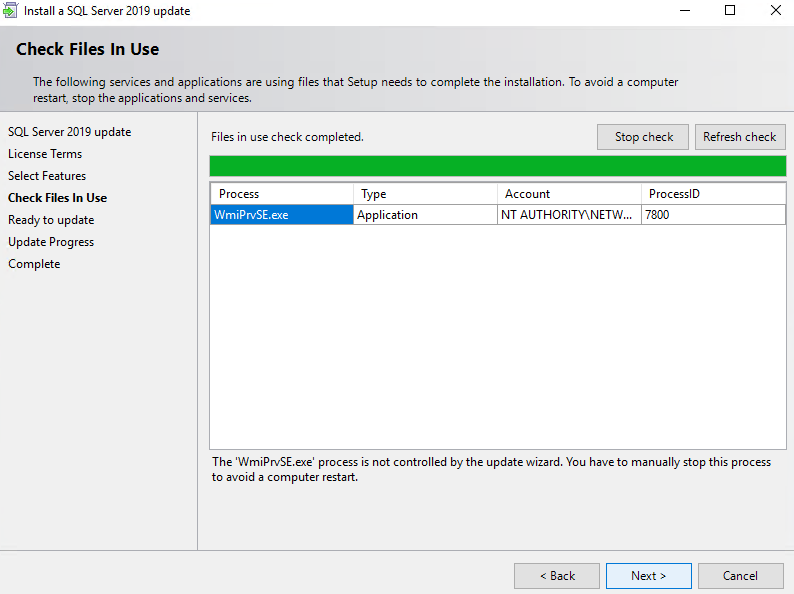
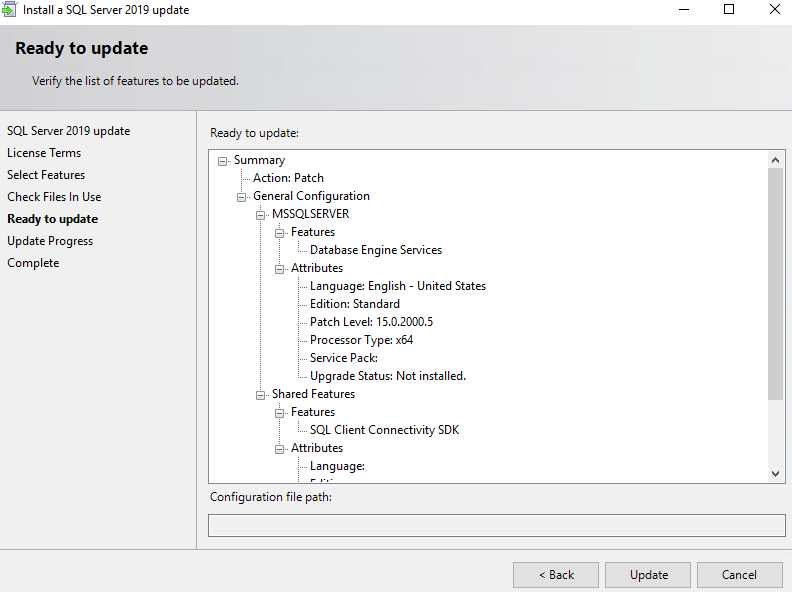
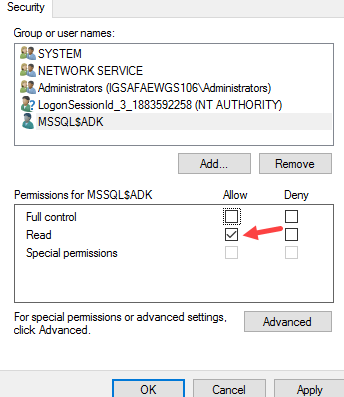
The following table describes the editions of SQL Server. Please submit a Remedy ticket to the Enterprise Licensing queue (via an email to ServiceDesk@usgs.gov) for pricing information and to purchase licenses for SQL Server. PER CORE: Gives customers a more precise measure of computing power and a more consistent licensing metric, regardless of whether solutions are deployed on physical servers on-premises, or in virtual or cloud environments. SERVER + CAL: Provides the option to license users and/or devices, with low cost access to incremental SQL Server deployments. Microsoft SQL Server lifecycle dates can be found on here. Beginning with SQL Server 2017, Microsoft adopted a new “Modern Servicing Model” for updating SQL Server. See this page for more information. An excerpt is provided below: The Modern Servicing Model Starting with SQL Server 2017, we are adopting a simplified, predictable mainstream servicing lifecycle: 10/8/2018: Changes made to the above! Note: the Modern Servicing Model (MSM) only applies to SQL Server 2017 and future versions. Servicing lifecycle The servicing lifecycle is unchanged from SQL Server 2016: The following steps will walk you through a clean installation of SQL Server 2019 Standard. Mount the supplied .iso file and run setup.exe as an administrator. The SQL Server Installation Center will open to the Planning page. Access the links on this page to ensure your environment meets the minimum requirements for installation. If you are upgrading from a previous version of SQL Server, be sure to reference the upgrade documentation linked on this page. Once you have completed your planning research, click Installation on the left had pane. Click the first link to install a new SQL Server stand-alone instance. If you are upgrading from a previous version, click the link at the bottom of this pane. Refer to SQL Server 2019 supported version and edition upgrades Enter the supplied product key when prompted and click Next. Accept the license terms then click Next. The install rules checker will run to verify basic requirements. Clicking on the Windows Firewall warning link will remind you that you may need to open ports depending on your application needs. Click Next. Check the box next to Database Engine Services, at a minimum, to install a new SQL Server instance. Other features can be installed at this time as needed. Note the default install location of the instance and shared features, and change if needed for your environment. Click Next. Choose the default MSSQLSERVER instance name, or specify a custom name for the instance. Note that the instance name will be part of the SQL Server directory. Click Next. Configure the startup type for each of the services listed based on your needs. These can always always be changed later in the Windows Services Manager. Microsoft recommends checking the box next to “Grant Perform Volume Maintenance Task…” to enable instant file initialization. This allows for better performance since deleted disk content is overwritten only as new data is written to files. As Microsoft clarifies in this document, deleted data not overwritten could theoretically still be accessed, however, they state the benefits of instant file initialization outweigh the security risk. Click Next. Microsoft’s best-practice recommendation is to use Windows authentication mode whenever possible, unless there is a specific need for SQL Server authentication. Click Add to add at least one administrator account. Click the other tabs highlight above to customize the install to meet your needs. Click Next. Review the installation summary. If no changes are needed, click Install. Once installation completes, you will be prompted to restart the server. Click OK to acknowledge the message, then click Close. Restart the server to finalize installation. After successfully installing SQL Server 2019, be sure to follow the guidance under the Securing SQL Server section of this page to apply the latest updates. If needed, install other applications such as SQL Server Management Tools or Reporting Services from the SQL Server Installation Center. The latest updates to SQL Server can be found here. Determine the version of SQL currently installed following the guidance here. The GS: Critical to Low Security Patches Needed – SQL Server BigFix WebReport should be referenced to see a list of computers in your environment and the SQL patches that are needed on those computers. Beginning with the February 2021 ePatching cycle, the GS: ePatching Windows Security Patches – <month> <year> (SQL Server Non-Clustered) BigFix baseline will be applied to all production systems. In the example below, we walk through installation of a SQL Server 2019 Cumulative Update (CU). The steps below assume you have identified the latest CU and have downloaded it from the Microsoft website. Right-click the update install package and Run As Administrator. Accept the license terms and click Next. Ensure your SQL Server instance is checked and click Next. Follow the guidance from the files in use check and click Next. Review the installation summary, then click Update. Depending on which services are running on your server, you may need to restart. Once completed, verify your SQL Server is up to the latest version. Some earlier versions of MSSQL were installed with a certificate that was signed with a weak algorithm (SHA1). Tenable may flag these instances under one or more plugin IDs. To remediate these vulnerabilities, local admins should replace the default weak SSL certificate with one signed by a certificate authority (CA) using a strong algorithm. Using Active Directory Certificate Services, admins can generate signed SSL certificates using DOI’s CA server. The steps below describe the process of configuring MSSQL to use the new signed certificate. Given the variable nature of MSSQL deployments throughout USGS, Administrators are strongly encouraged to test these steps on non-production instances first. To force encrypted communications for all SQL clients, perform the following steps on the database: More details on encrypting SQL connections can be found here.Editions
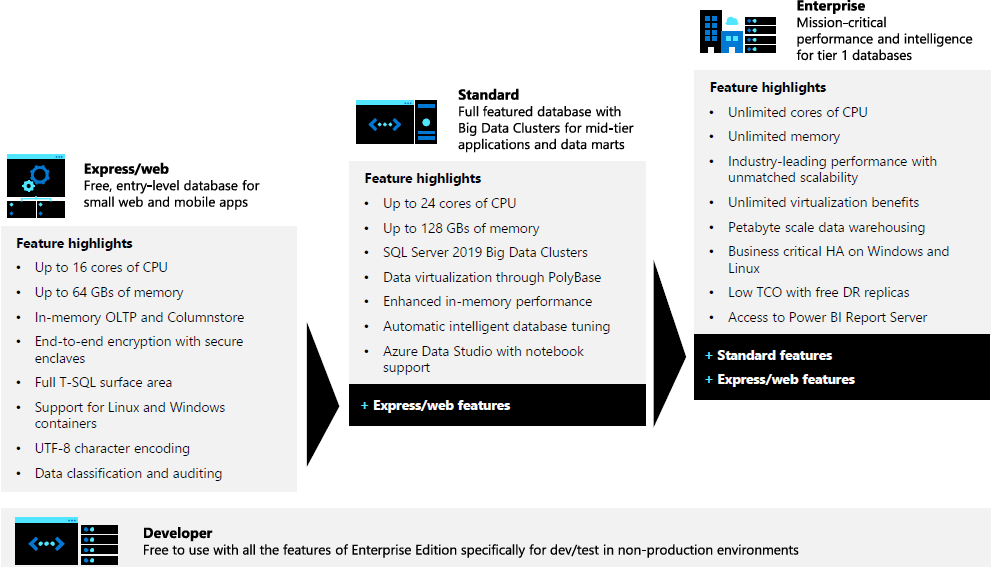
SQL Server Edition Definition Enterprise The premium offering, SQL Server Enterprise edition delivers comprehensive high-end datacenter capabilities with blazing-fast performance, unlimited virtualization1, and end-to-end business intelligence – enabling high service levels for mission-critical workloads and end-user access to data insights. Standard SQL Server Standard edition delivers basic data management and business intelligence database for departments and small organizations to run their applications and supports common development tools for on-premises and cloud – enabling effective database management with minimal IT resources. Web SQL Server Web edition is a low total-cost-of-ownership option for Web hosters and Web VAPs to provide scalability, affordability, and manageability capabilities for small to large-scale Web properties. Developer SQL Server Developer edition lets developers build any kind of application on top of SQL Server. It includes all the functionality of Enterprise edition, but is licensed for use as a development and test system, not as a production server. SQL Server Developer is an ideal choice for people who build and test applications. Express Editions Express edition is the entry-level, free database and is ideal for learning and building desktop and small server data-driven applications. It is the best choice for independent software vendors, developers, and hobbyists building client applications. If you need more advanced database features, SQL Server Express can be seamlessly upgraded to other higher end versions of SQL Server. SQL Server Express LocalDB is a lightweight version of Express that has all of its programmability features, runs in user mode and has a fast, zero-configuration installation and a short list of prerequisites. Feature Highlight Comparison (SQL Server 2019)
Licensing
Licensing Models
Product Lifecycle
Installation


Securing SQL Server


SSL Certificates

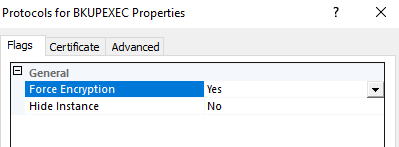
Force Encryption